To restore a job, at first insert your external drive, or make sure the network folder is accessible via local network. The storage must contain the drive image backup.
Then select a job in the list, and click "Restore":
![]()
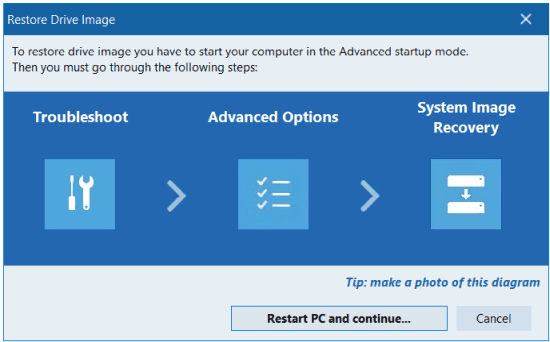
The dialog window will appear:

This is just a short diagram to show you the steps you need to complete. We recommend to make a photo of this diagram with your smartphone.
Close all other programs, then click the "Restart PC and continue..." button. Your PC will be restarted in Advanced startup mode.
Note: you can enter this mode without the help of Perfect Backup. You can click Start -> Power, press and hold Shift key on the keyboard and click Restart button.
From the Choose an option window, go to Troubleshoot >> Advanced Options >> System Image Recovery

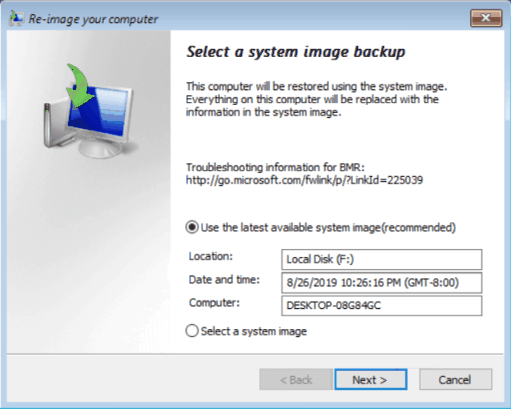
If the backup is detected automatically on the external drive, you can choose Use the latest available system image.
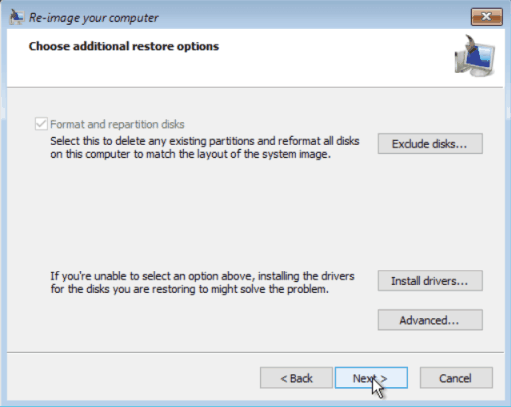
In this case you may need to choose additional restore points.

Format and repartition disks: If you're restoring to a new hard disk, it's better to enable this option.
Exclude disks: If you have multiple hard drives and don't want to restore system image backup to all of them, select the drives that you want to exclude from the restore operation.
Advanced settings: Configure additional options for system image recovery. You can also change where Windows will search for the system image backup files. If your system image is stored on a network location, select that option.
Click Next.
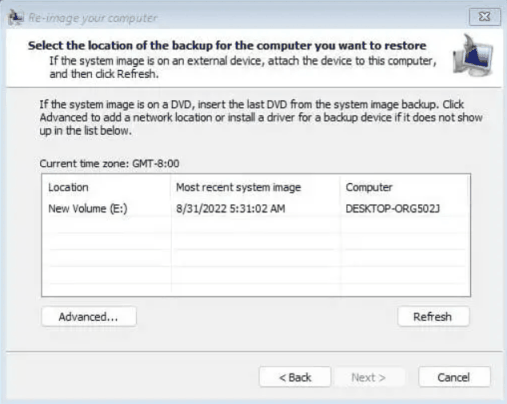
If your backup is stored in the Network location, or you want to choose the restore point from the external drive manually, then select the option Select a system image on the Re-Image Your Computer window.
You will see the window where you can choose the image you want to use.

Click Next.
The system image recovery process will now start, and you'll see the progress bar appear on the screen. Depending on the size of your system image and the speed of your hard drive, this process can take a while to complete.